This section will be talking about all the enemies in act 1 and the first half of act 2, these enemies consist of all the repeatable enemy fights such as a Mossmir . the creatures will be listed in terms of the hunter journal you learn them. and they will be the few I’ve chosen as the most notable in the region
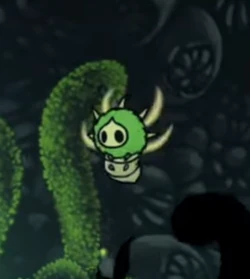
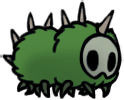
Mossgrub
Wanders aimlessly or stay still on floors or walls, deals damage on contact. If attacked while still, they begin to wander.
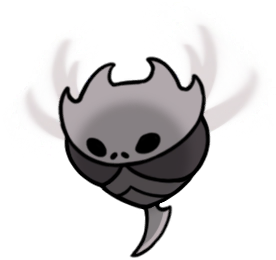
Skull Brute
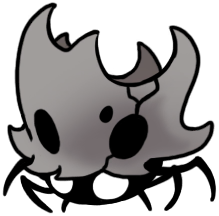
Pretends to be a skull until Hornet gets close, after which the skull shakes, and it pops out of the ground fully. It moves back and forth on its platform, turning at edges or if it meets a wall. It charges towards Hornet if it sees her.
Skull Brute deals ![]()
![]() on contact, even when it has not emerged from hiding. Being wary of any large skulls on the ground or memorising which skulls are Skull Brutes can prevent suddenly getting hit.
on contact, even when it has not emerged from hiding. Being wary of any large skulls on the ground or memorising which skulls are Skull Brutes can prevent suddenly getting hit.
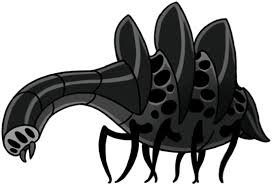
Vicious Caranid
Vicious Caranids fly aimlessly and extremely slowly, but they gradually pursue Hornet once she gets close.
They attack by flailing their sharp tails wildly around themselves, Comboing Hornet for ![]() +
+![]() . They deal
. They deal ![]() on contact.
on contact.
Since this attack covers a wide area and deals heavy damage, take care and avoid being cornered by Vicious Caranids. It is possible to bounce over them entirely with downward attacks, but note that their body and blade attack are different sizes. Missing the timing causes Hornet to take damage.
Smelt Shoveller
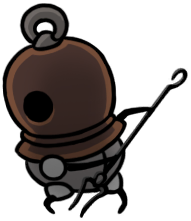
Smelt Shovellers are usually found patrolling an area, but some may be seen stationary at work beside flintstone deposits.
To attack, they rear their bident back before jabbing towards Hornet.
The bells they wear on their heads make them immune to specifically Needle-bounces, but they are vulnerable while winding up their attacks and after they have attacked.
Silk Snipper
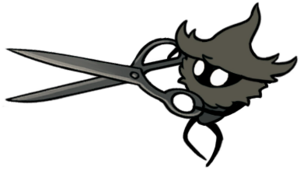
Silk Snippers naturally wander back and forth, and stay alert once Hornet has entered their range, taking a stance with their scissors out and ready to attack. They also walk backwards or forwards in between attacks to reposition. Silk Snippers have 5 moves:
- Dash Cut: Opens their scissors wide for a moment before lunging at Hornet and snipping them. They can block attacks during the foreswing, but doing so resets their foreswing. Mindlessly attacking them only leads to them blocking every attack, so make sure to wait for openings. They always follow this move up with Backdash.
- Snip Flurry: Rears their scissors back and does a small dash forwards whilst snipping repeatedly. If Hornet is caught in the attack at any time, they combo her for
 +. They always follow this move up with Backdash.
 - Scissor Parry: Holds their scissors up in front of themselves for 1.5 seconds, blocking any attack from that direction. If Hornet strikes the scissors whilst they’re Parrying, they immediately follow up with either of the two attacks listed above.
- Backdash: Does a short dash backwards; almost always used as a follow-up.
- Jump/Dive Burst: Readies their scissors and cuts through any of the wooden platforms to get to Hornet. This move can be used to either get up or down to the layer Hornet is on.
- During the enemy gauntlet fight in Chapel of the Reaper, they can burrow into the ceiling out of the arena, before burrowing down attempting to drop directly onto Hornet’s position.
Silk Snippers deal ![]() with all attacks except Snip Flurry, and upon contact.
with all attacks except Snip Flurry, and upon contact.
It is easy to stay on top of them with needle bounces, as none of their attacks have vertical hitboxes and they can only attack in front of themselves. Be careful that they don’t dash backwards out of Hornet’s range, however.
Also be wary when they’re on a different elevation level than Hornet, as they can suddenly get to her platform even when seemingly idle.
Judge
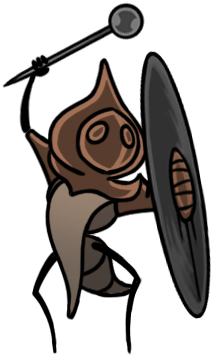
Judges either start off in place, or patrolling their platform. Once Hornet comes near, they begin their judgement, indicated by them banging their mallet against their cymbal as a sort of challenge. Whilst Hornet is not in range, they simply walk towards her until they are in range to attack. Judges have 4 different moves they will use, depending on their range from Hornet:
- Double Slam: Raises their mallet then swings it down at Hornet; after a delay, does another, much larger swing whilst also moving further forward. They can turn the second swing around if Hornet goes behind them after the first swing. This move is only used if Hornet is close to them.
- Dash Bash: Holds their mallet outwards behind themself and tenses up briefly and then dashes towards Hornet, keeping their shield up for the attack’s entire duration. They will stay in place for a moment after ending this dash, giving a small opening to Needle bounce. Often used if there is distance between them and Hornet.
- Jump Strike: Lowers their mallet before jumping towards Hornet, swinging their mallet as they land. Also often used if there is distance between them and Hornet.
- Backdash: Does a short dash backwards, often used after Double Slam or Dash Bash.
Judges’ shields very frequently come into play – whenever they are up, they block any Needle attacks and the majority of Tools from that direction. For all of the Judge’s first three listed attacks, their shields are up during the entire foreswing.
This means Hornet that may need to use a bait-and-punish playstyle in order to kill them, as they only leave openings after they attack. Every time they block an attack, they cycle through the first 3 moves in the order they are listed. This means Hornet can strike the shield until they perform a desirable attack, then dodge and take advantage of the opening. Needle bouncing with Reaper Crest or Wanderer Crest also proves very efficient, as they never raise their shields above their head. However, their Jump Strikes can hit Hornet unexpectedly while doing this, if not timed right. If timed right, the needle bounce will push them back down once they Jump Strike.